
Target audience: everyone who wants to create a product but doesn't know how to code. I'll try to avoid being too technical, but you'll need a basic understanding of web technologies and a little terminal knowledge.
These days, creating an MVP is easier than ever. You just go to bolt.new / lovable.dev / {nameYourFavourite} and just ask AI "create this and that". Those tools will make you a great prototype, and you can even deploy it right away and send it to your stakeholders or user group to validate this great idea of yours.
But what about the code quality? How good is the code under the hood? Spoiler alert: it’s almost never great. And when you take this project to a developer, they’ll most likely suggest starting from scratch.
So today, we’re answering the question:
How to vibe code an MVP that has a future (and that developers will love)
Here’s the answer right away: You should start with the code. Not a developer? That’s okay, I’ll show you.
We’ll be using Cursor, but as an alternative, you may use Claude Code.
Let’s create some magic 🦄
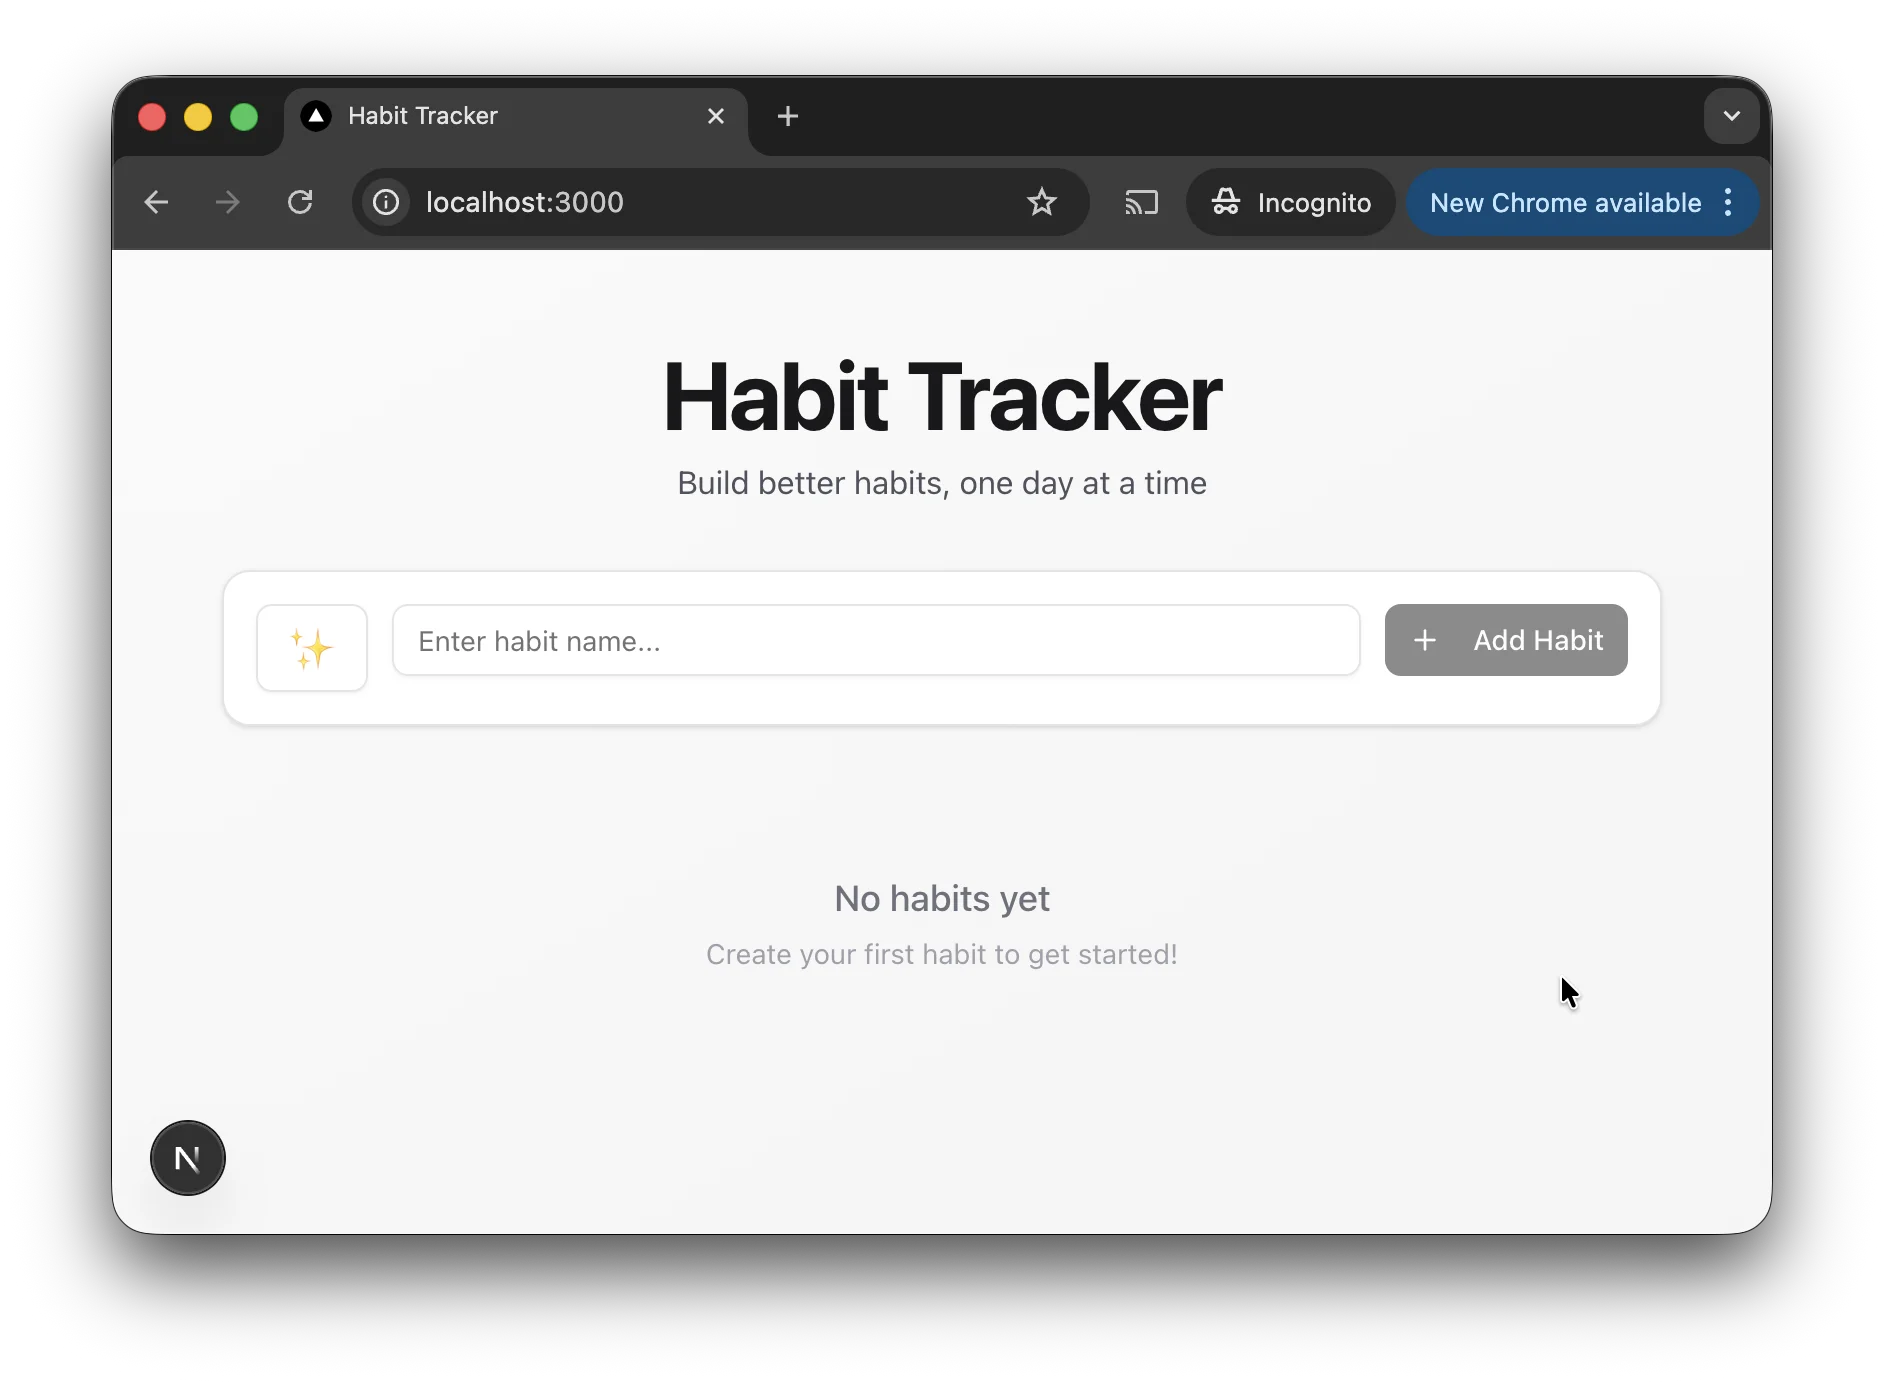
My brilliant product idea is a Habit Tracker, and I’ll use Next.js as the web framework for it. Next.js is a full-stack JavaScript framework that will most likely suit your product needs, but this tutorial is language and framework agnostic.
Here’s the action plan:
- Initialize project using official framework starter
- Create rules that will not allow your AI agent to write bad 💩 code
- Plan and build
- Verify and fix
- Deploy to public
0. Prerequisites
Make sure you have Node.js installed.
1. Initialize project
Open the terminal, and let’s kick off a new Next.js project:
npx create-next-app@latest habit-tracker --yes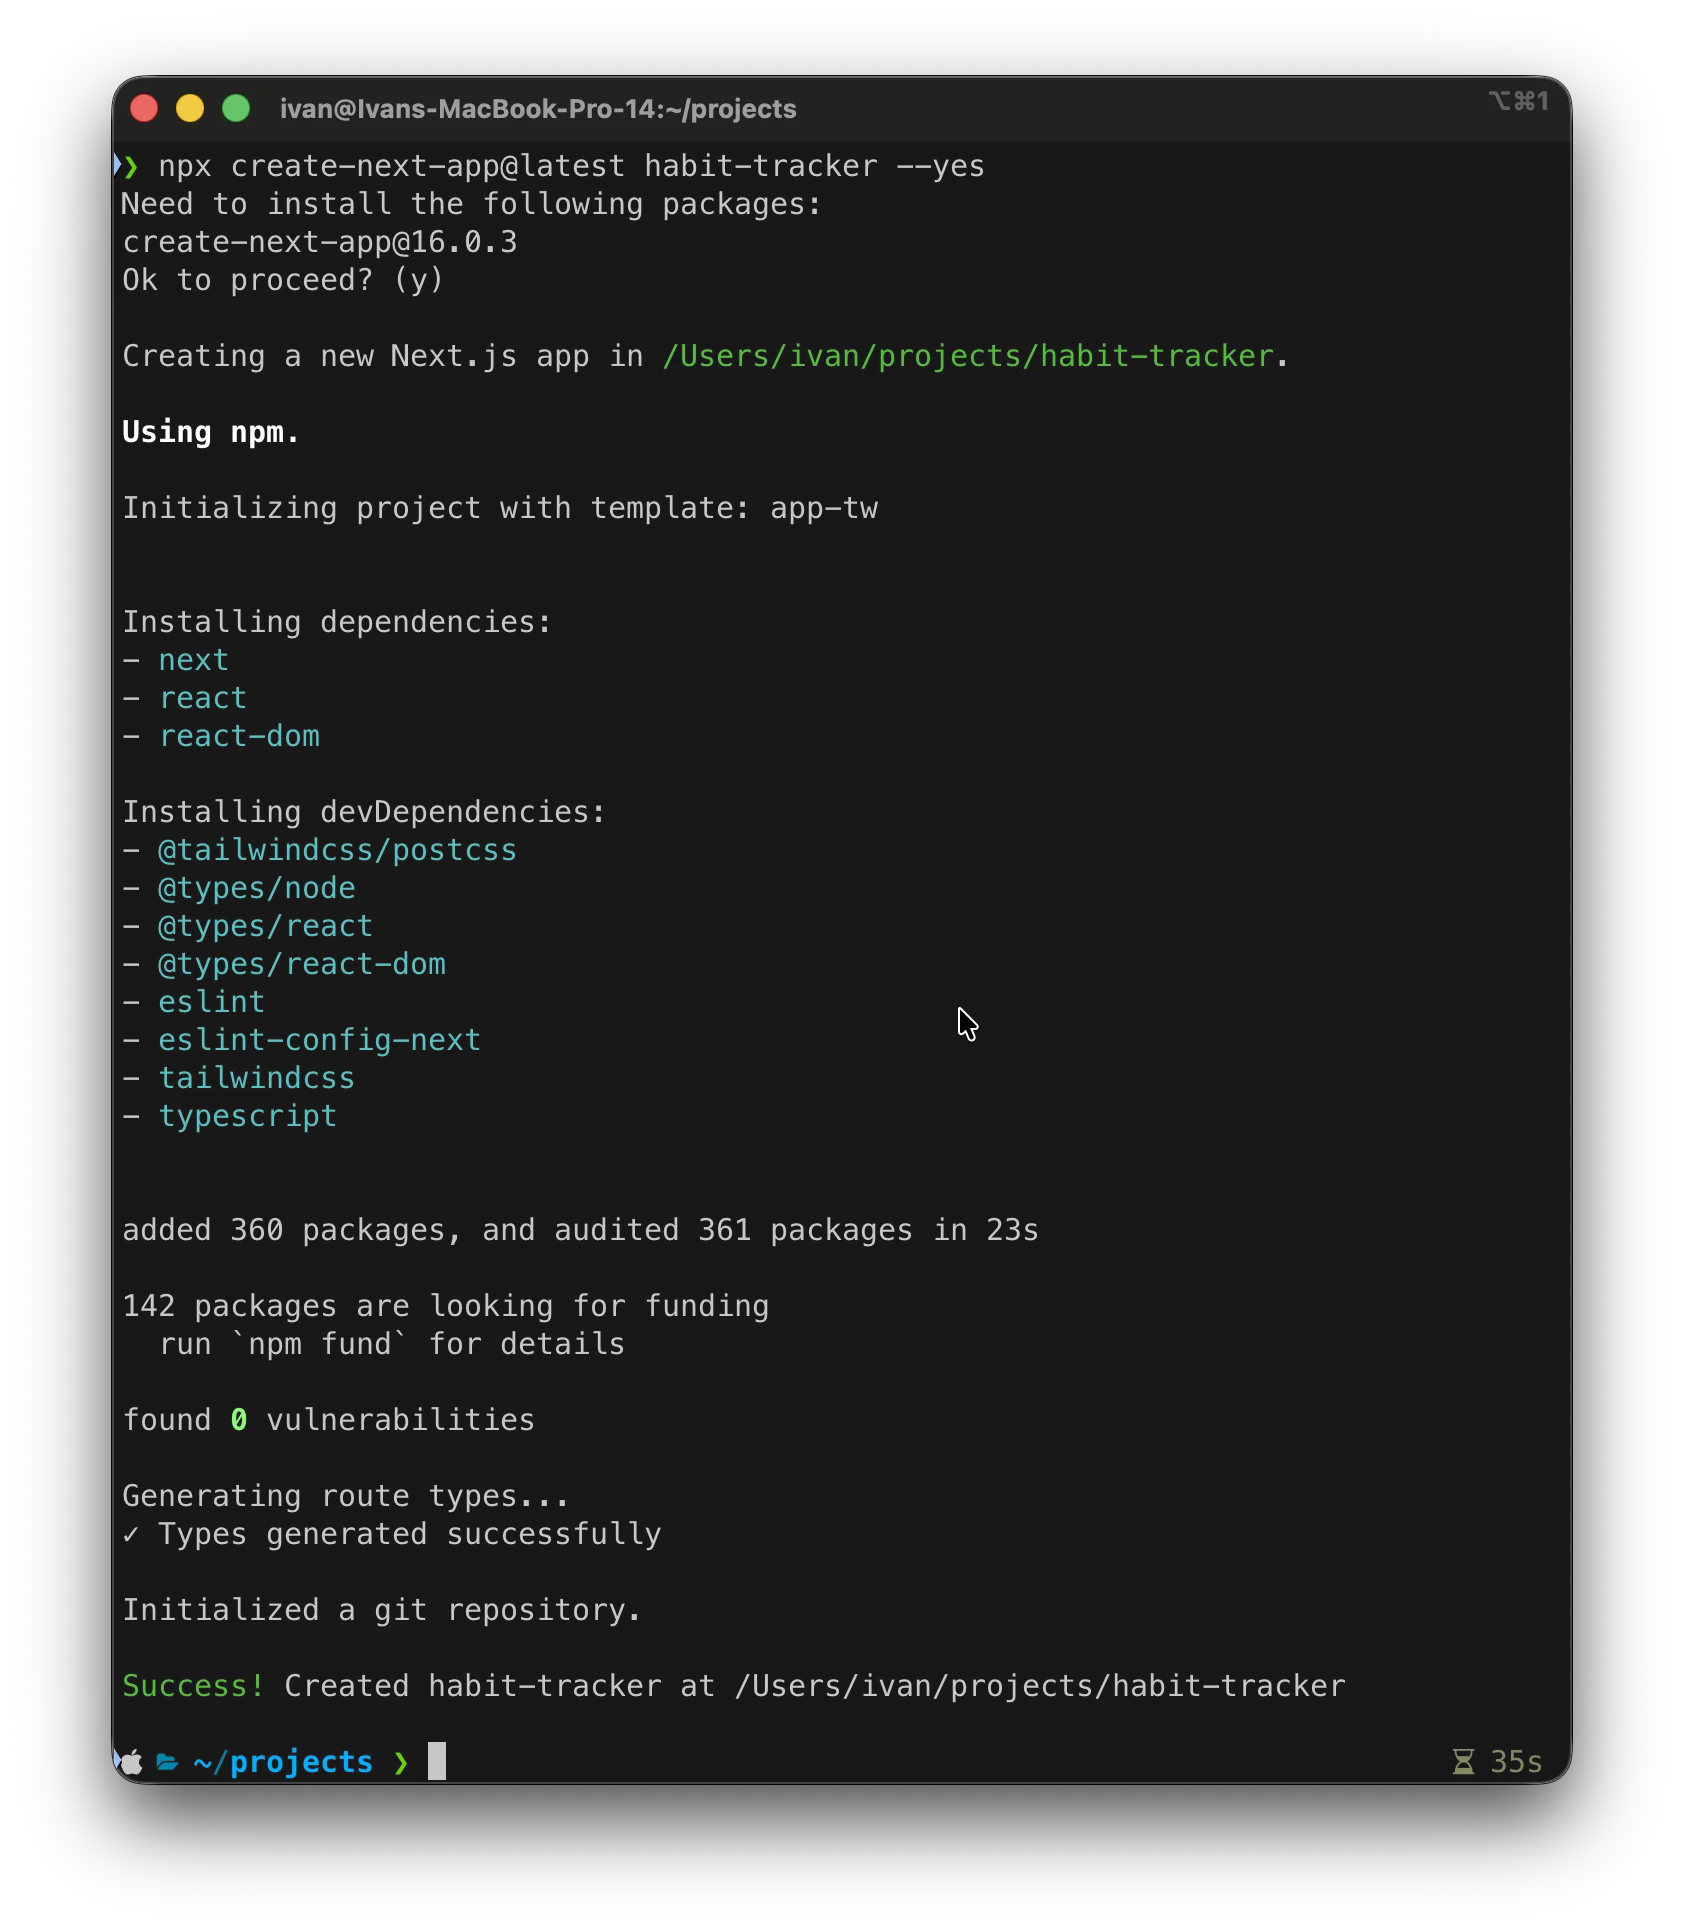
Now, let’s open it up in Cursor.
2. Create rules
Here are a few simple things you need to know when working with any AI agent:
- Garbage in, garbage out → If you give it unclear or misleading instructions, don’t expect good results.
- Context is King → The AI doesn't know what's in your head unless you tell it explicitly.
- Boundaries are beautiful → It needs strict limits and rules to follow; otherwise, the result will be too generic.
That’s exactly what we’re going to do: set the rules.
In the Agent window (Cmd+L or Ctrl+L), write this and run it:
add cursor rules:* Use latest versions of Next.js (App Router only), React, Tailwind, and shadcn/ui.* Code must be senior-expert level: clean, typed, scalable, and production-ready.* Default to Server Components; mark "use client" explicitly.* Follow React best practices: functional components, hooks, no legacy APIs.* Enable "strict": true; no any, no @ts-ignore; explicit return types.* Use Tailwind (latest) for styling; keep class lists short; extract patterns with cn() or CVA.* Use shadcn/ui for UI primitives; don’t edit generated components.* Use Route Handlers and Server Actions; avoid Pages Router or API routes.* Never expose secrets client-side; only use NEXT_PUBLIC_*.* Validate inputs with Zod or types; handle errors gracefully (error.tsx, toasts).* Components: small, focused, accessible (semantic HTML, ARIA, keyboard).* Prefer immutability, composition, and derived state; avoid prop drilling.* Optimize performance: minimal client JS, lazy load heavy parts, next/image, next/font.* Lint and type checks must pass with zero warnings.* No inline CSS (except vars), no mutable globals, no direct DOM manipulation.* Code should be maintainable, testable, and accessible by default.The list above is not exhaustive. You can tune your AI agent's behavior much more, especially if you have specific preferences for code style or architecture. The agent will follow it (well, in reality, mostly follow it 😀), but this is enough to set a solid foundation.

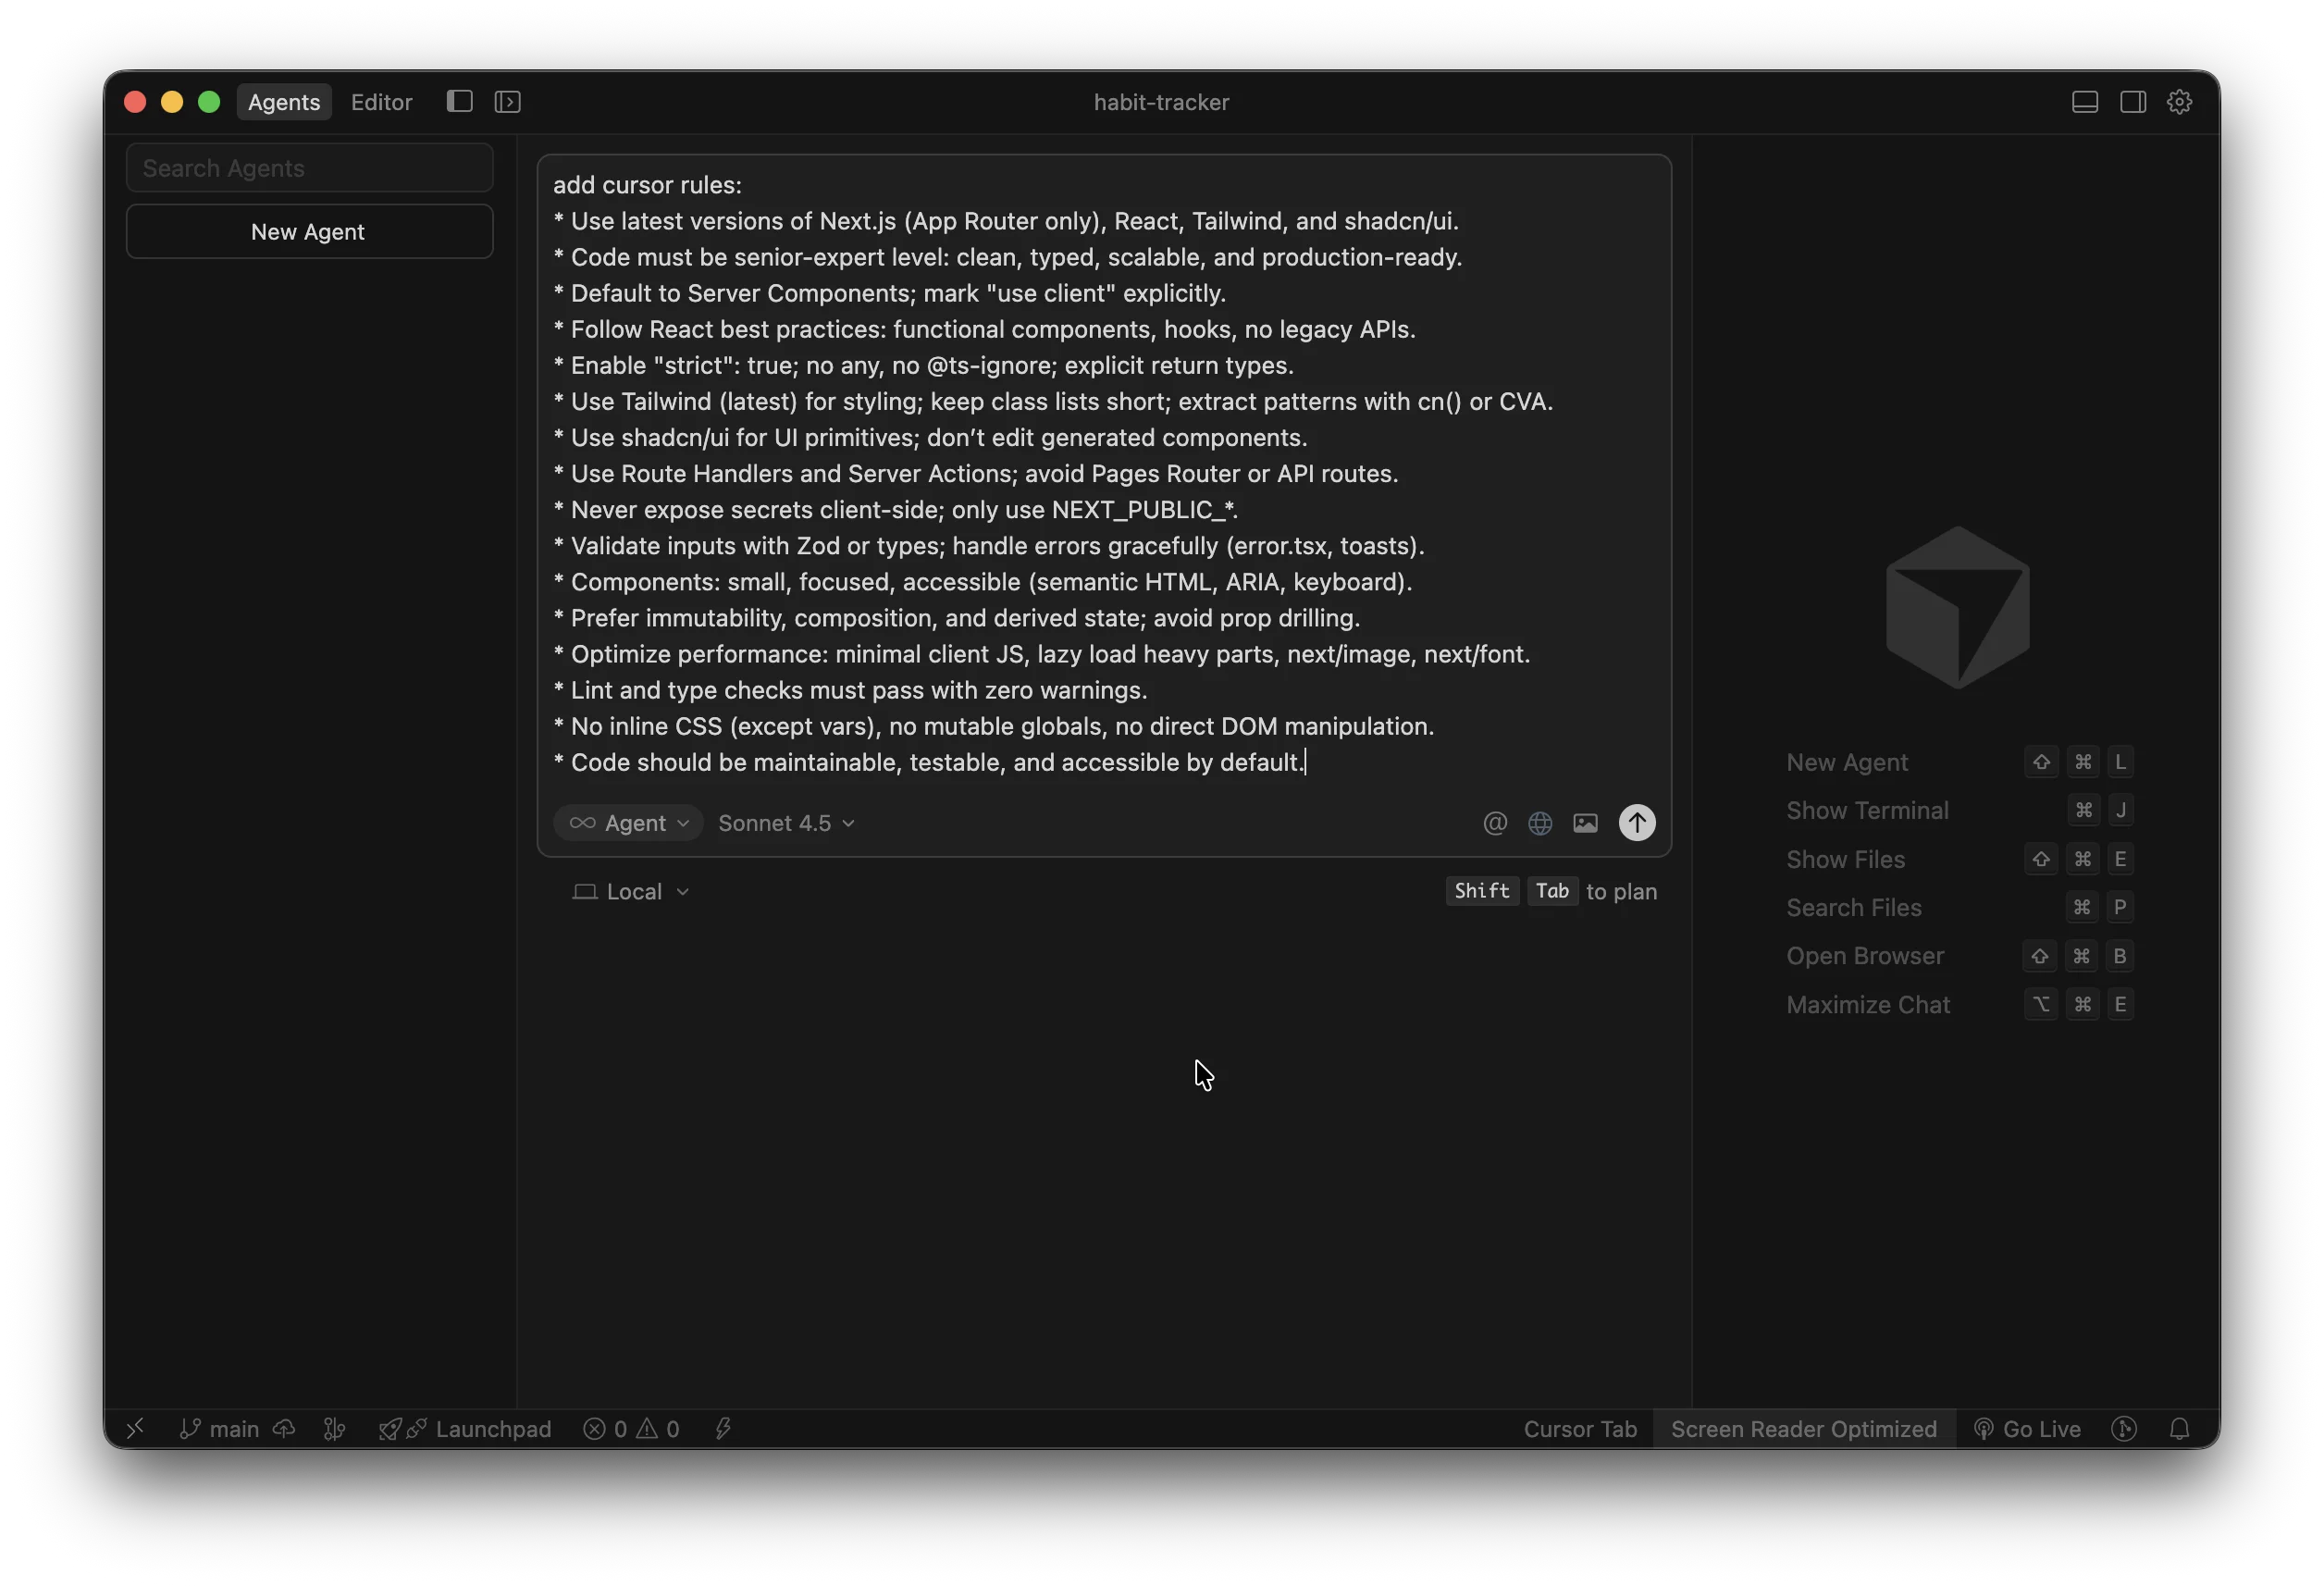
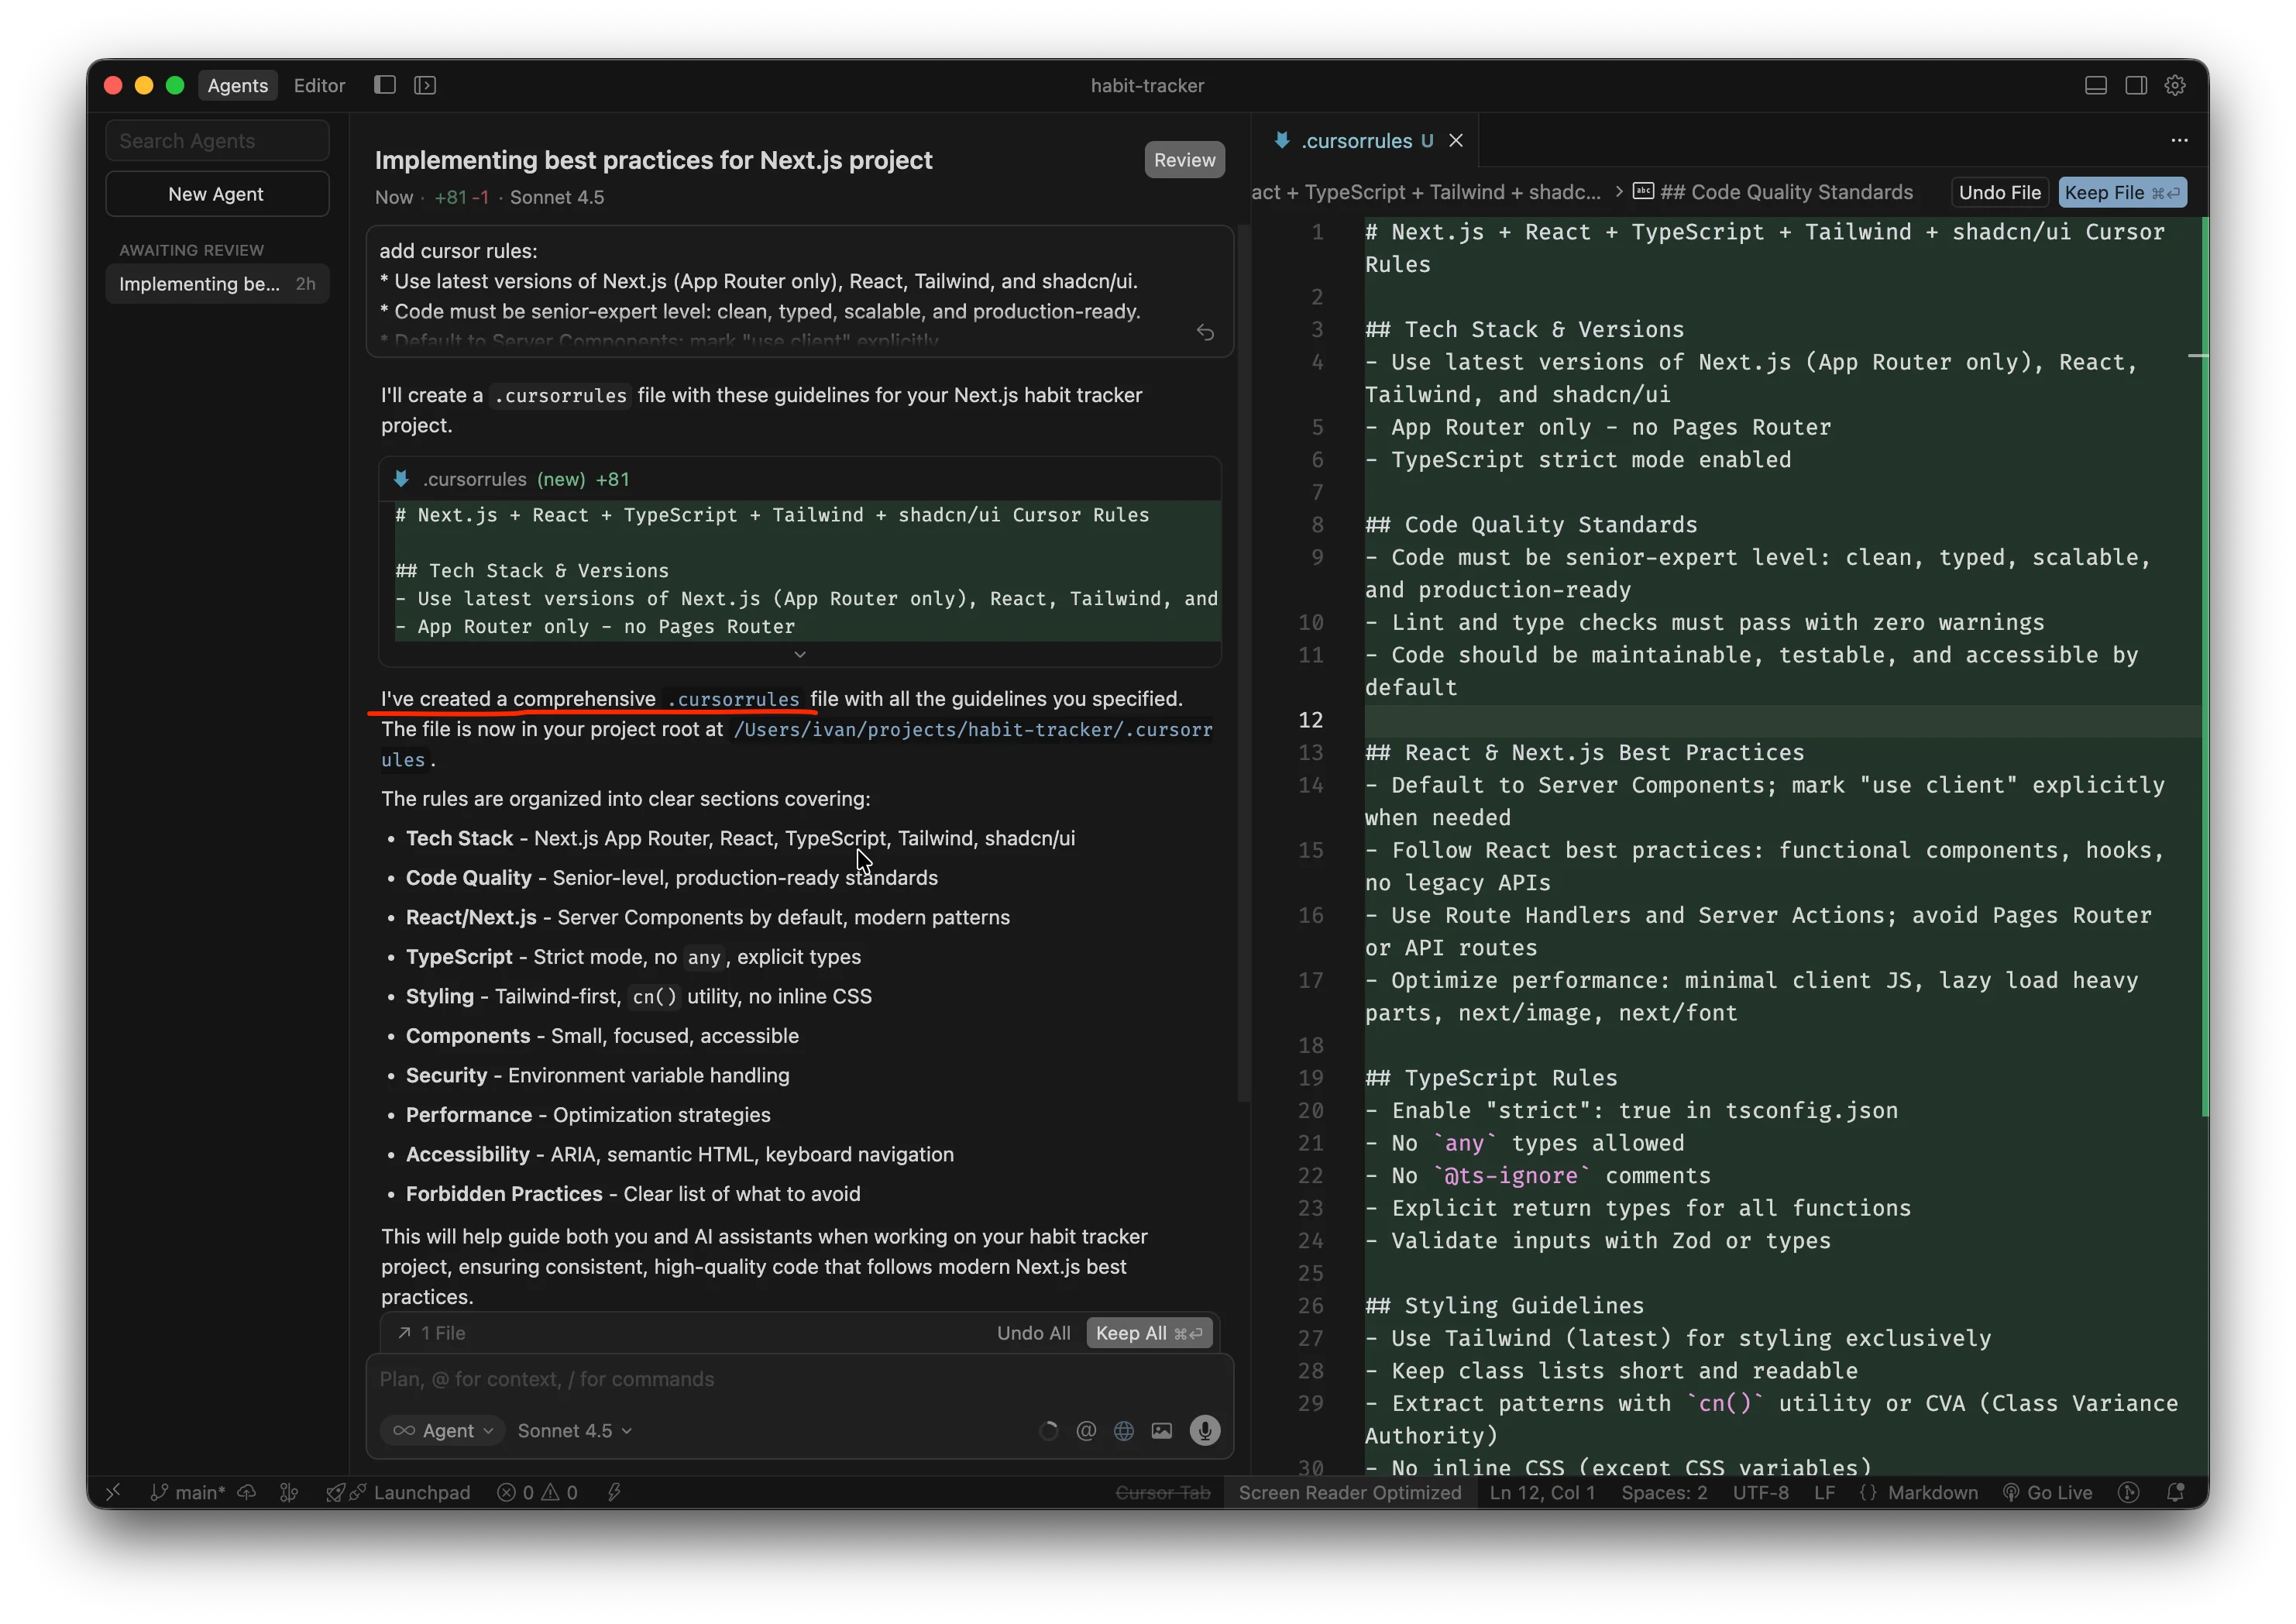
You might get a slightly different response, but as long as you see I've created a comprehensive .cursorrules, then we’re good to go to the next step.
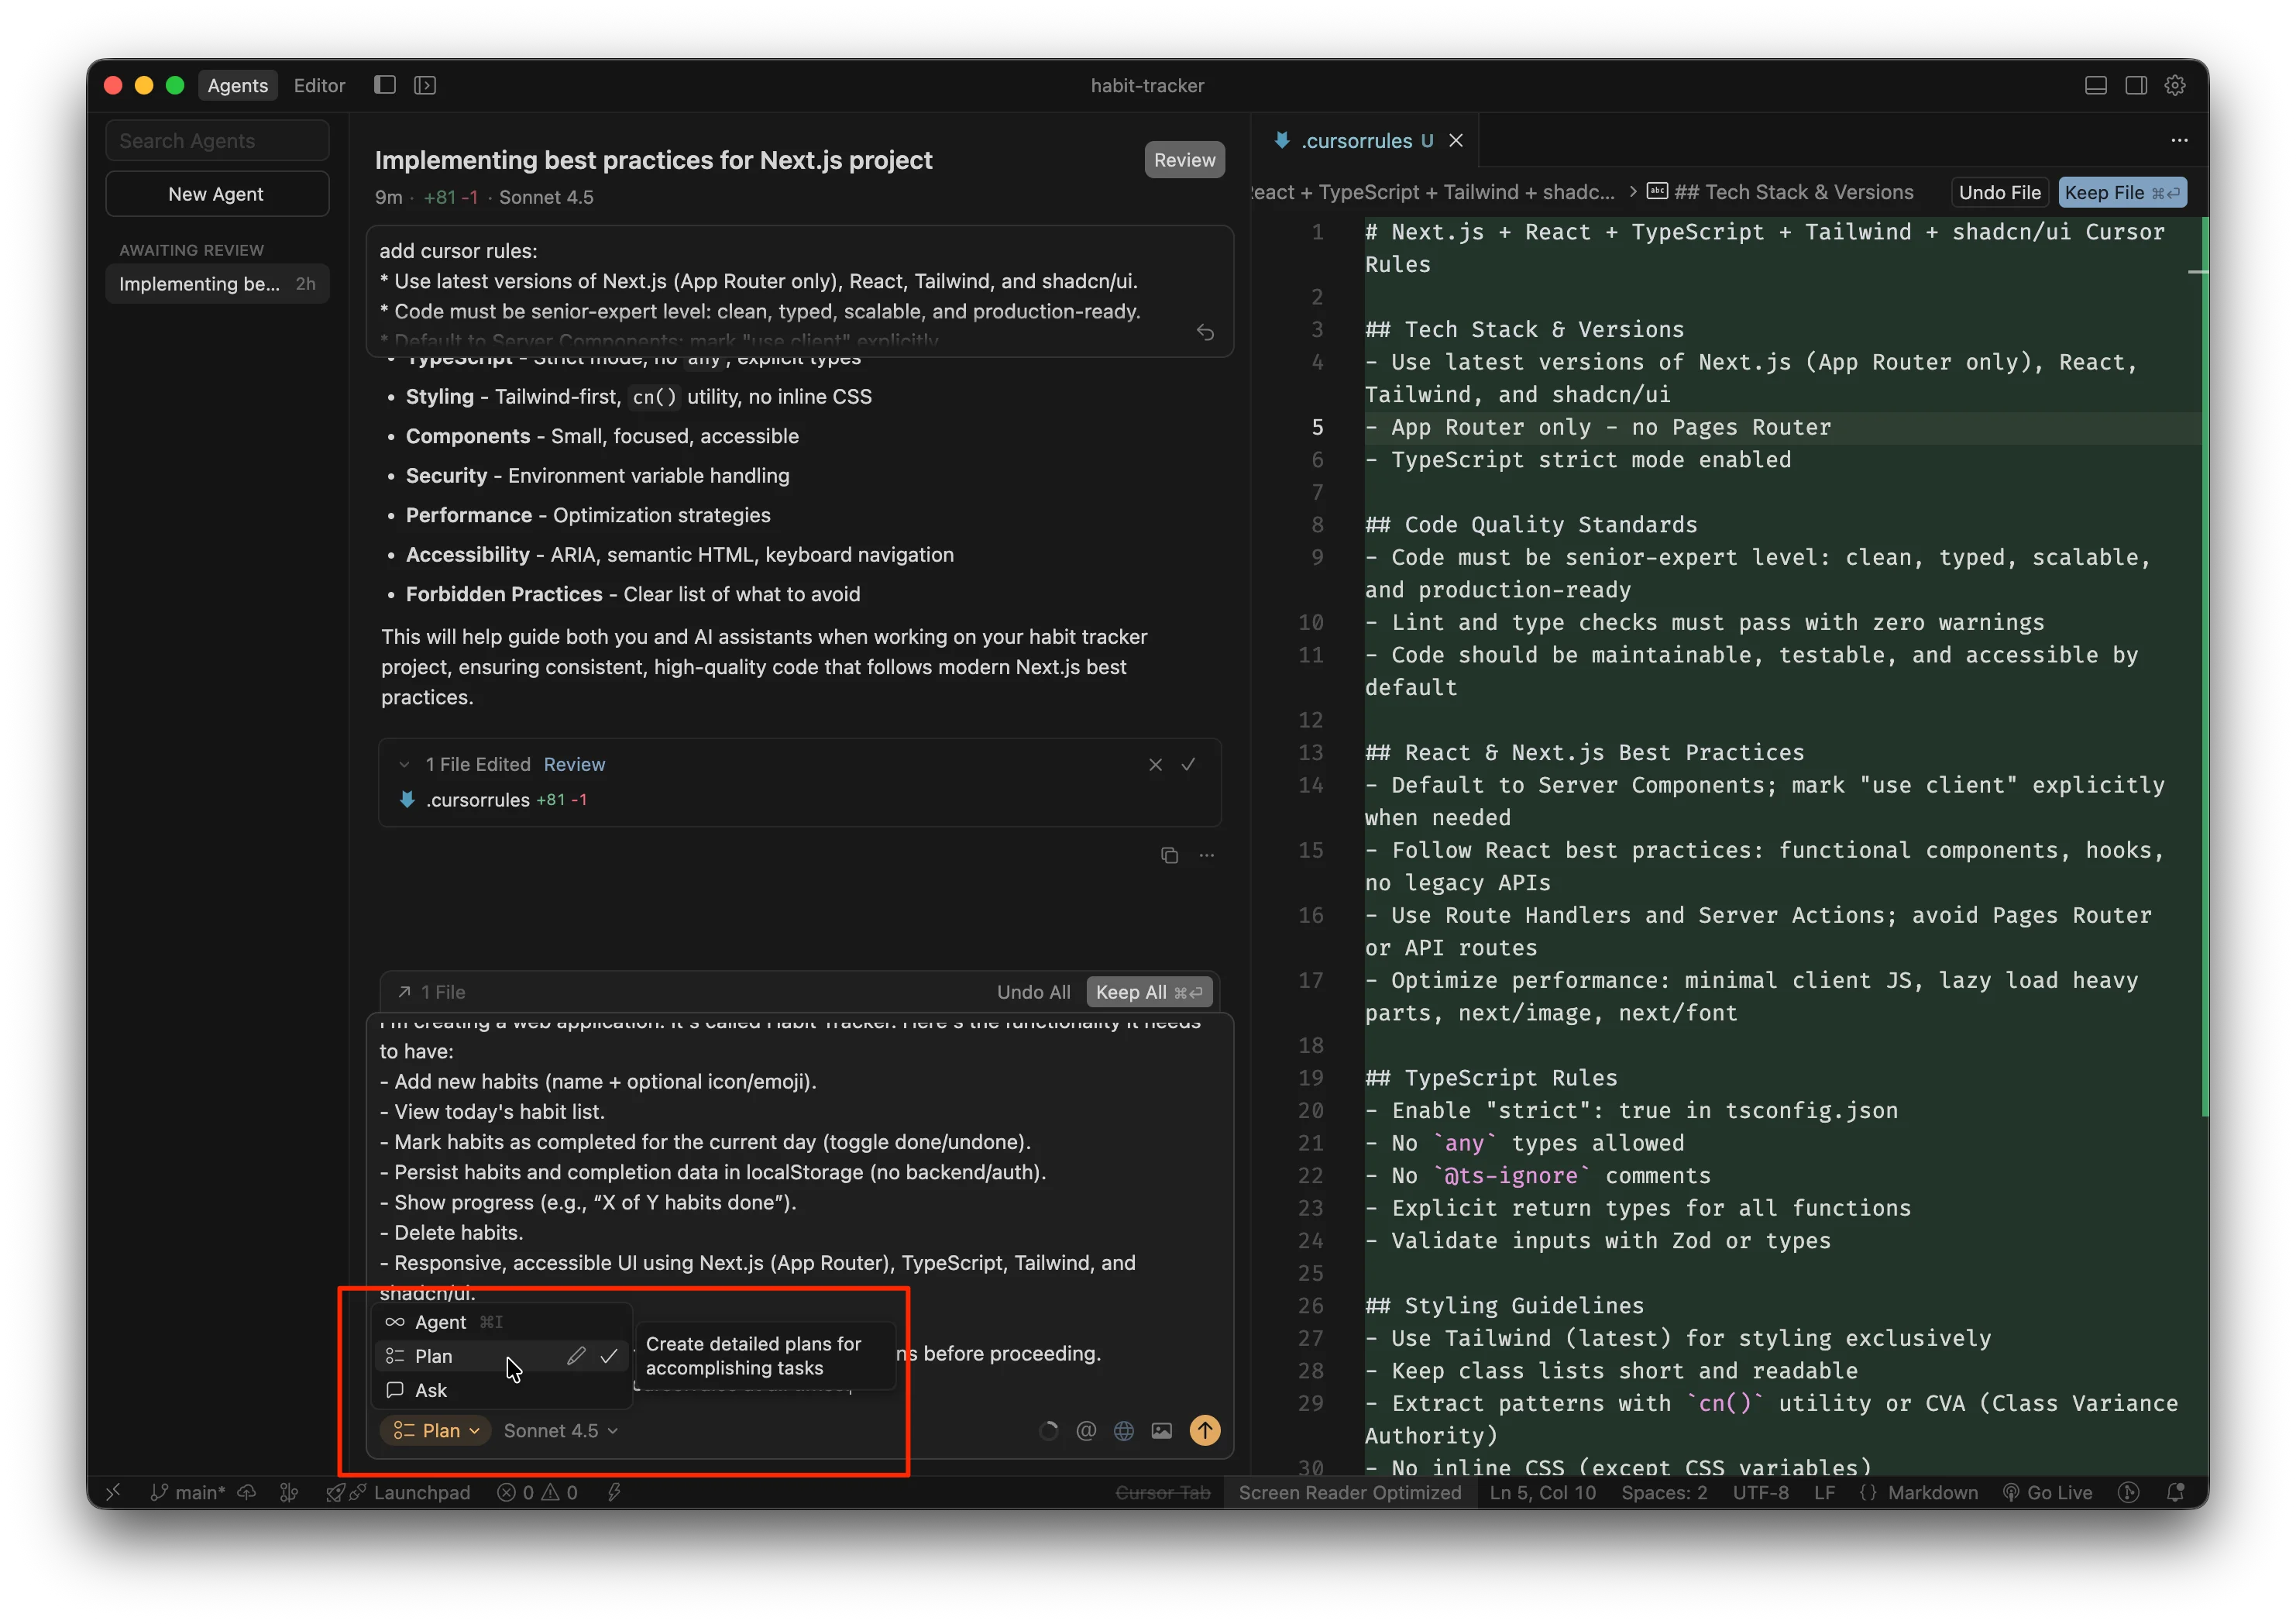
3. Plan and build
Now it’s time to actually build something. But we don't just build—we plan before building.
We’ll continue with the same Agent.
Let’s come up with a description for your application. You need to give it as many details as possible. Think of all functional requirements. Also, add details about how you’d like the app to look and all your design preferences. It’s your time to shine.
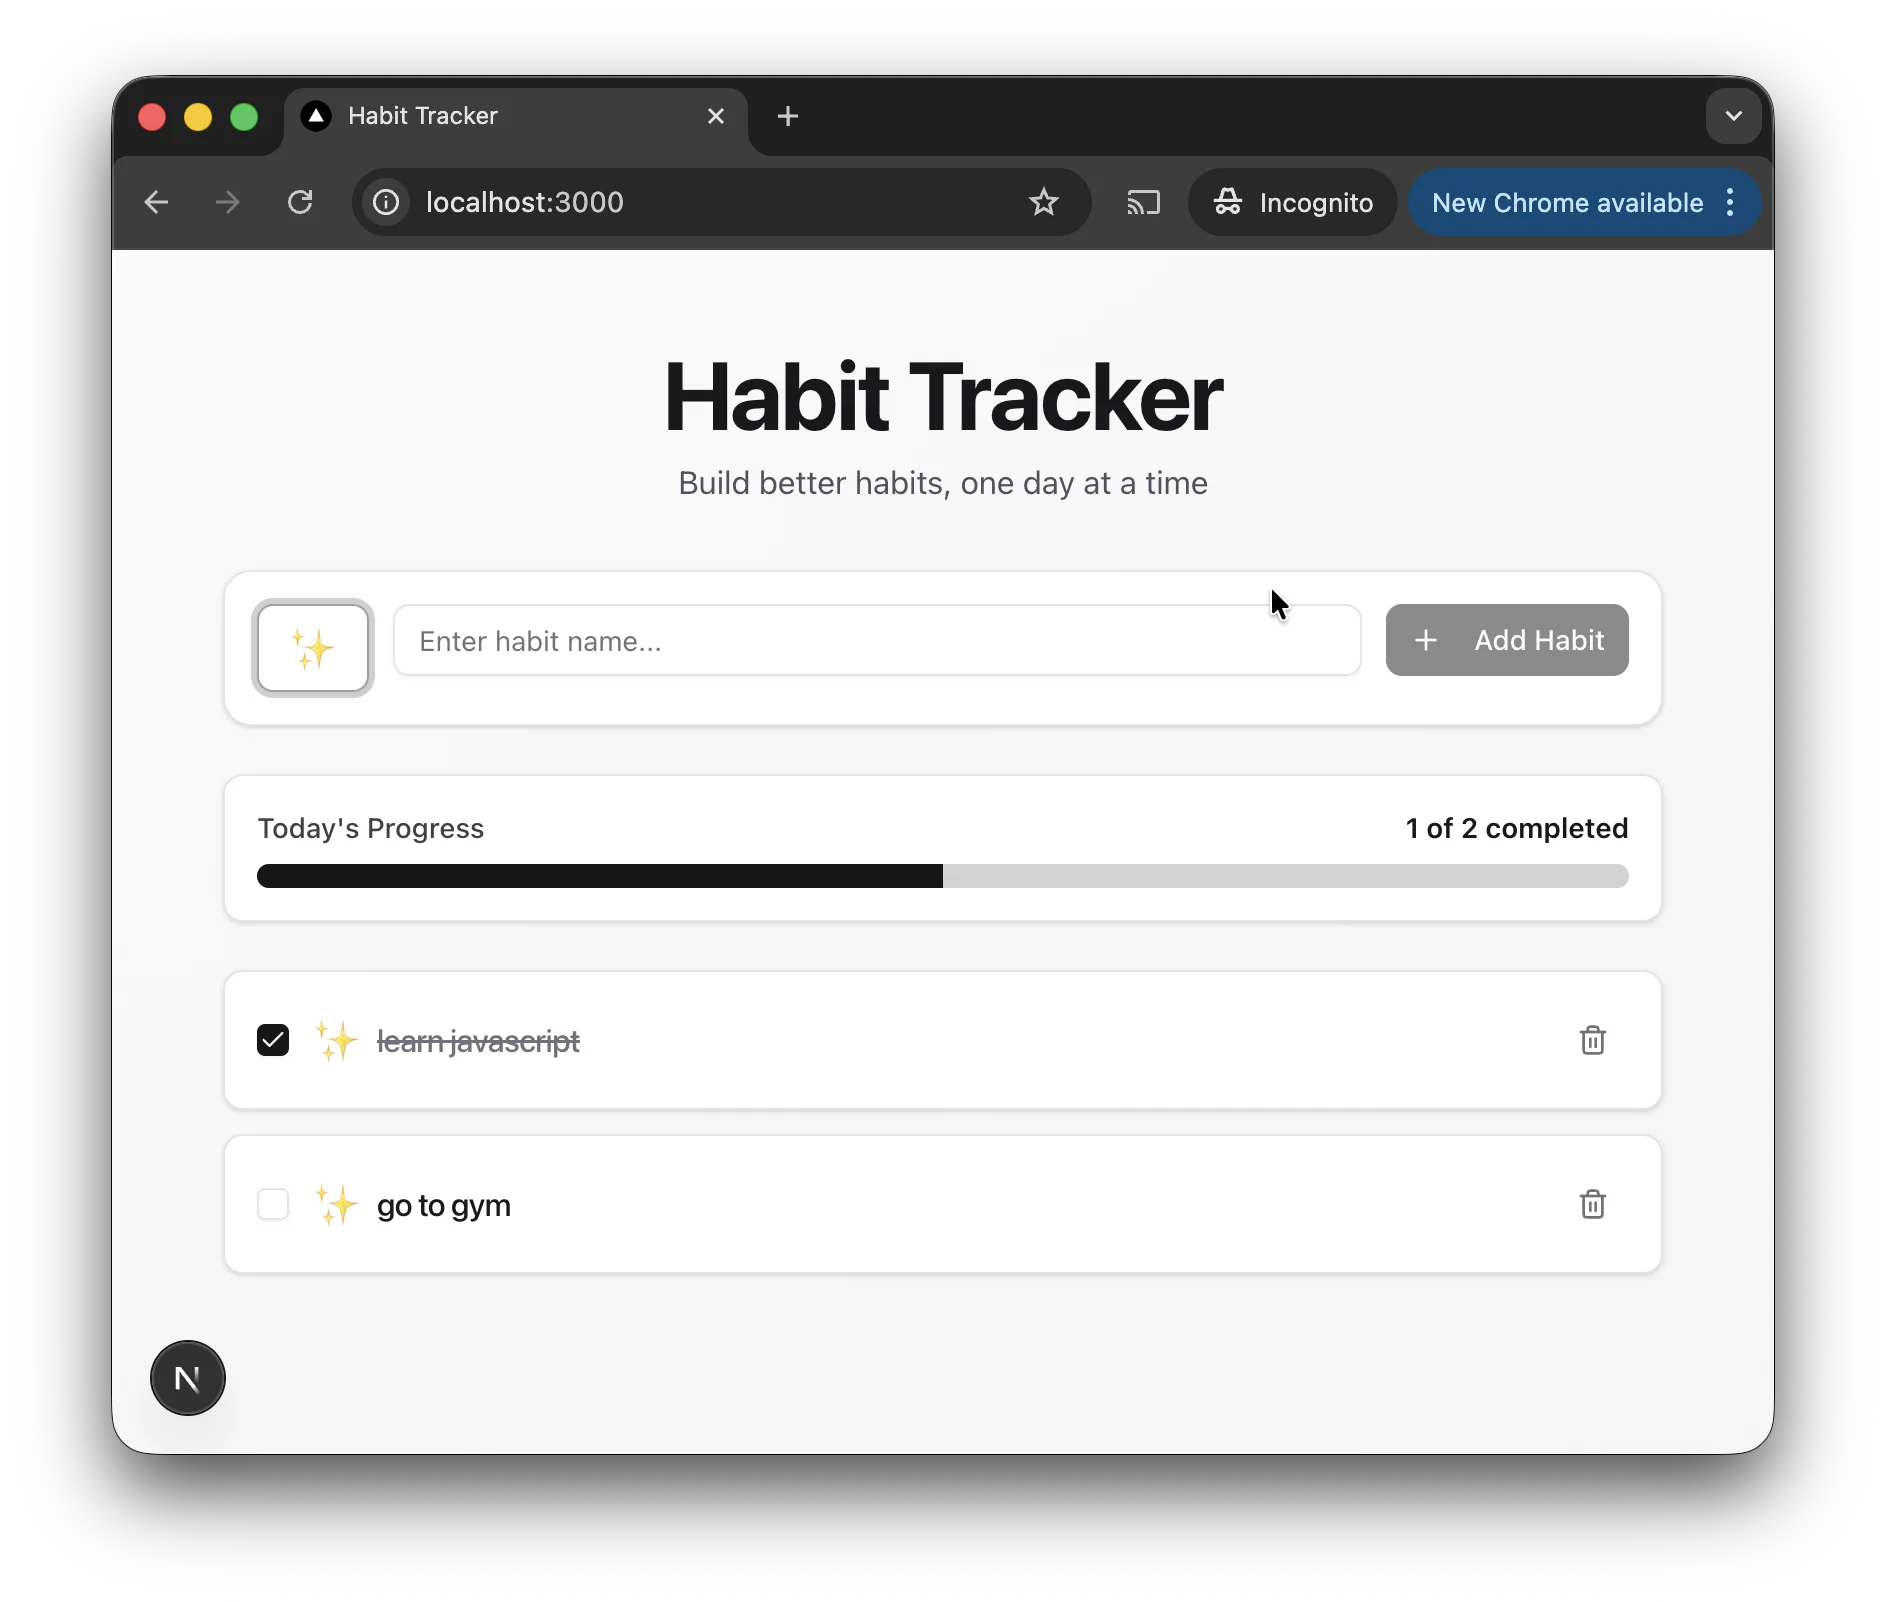
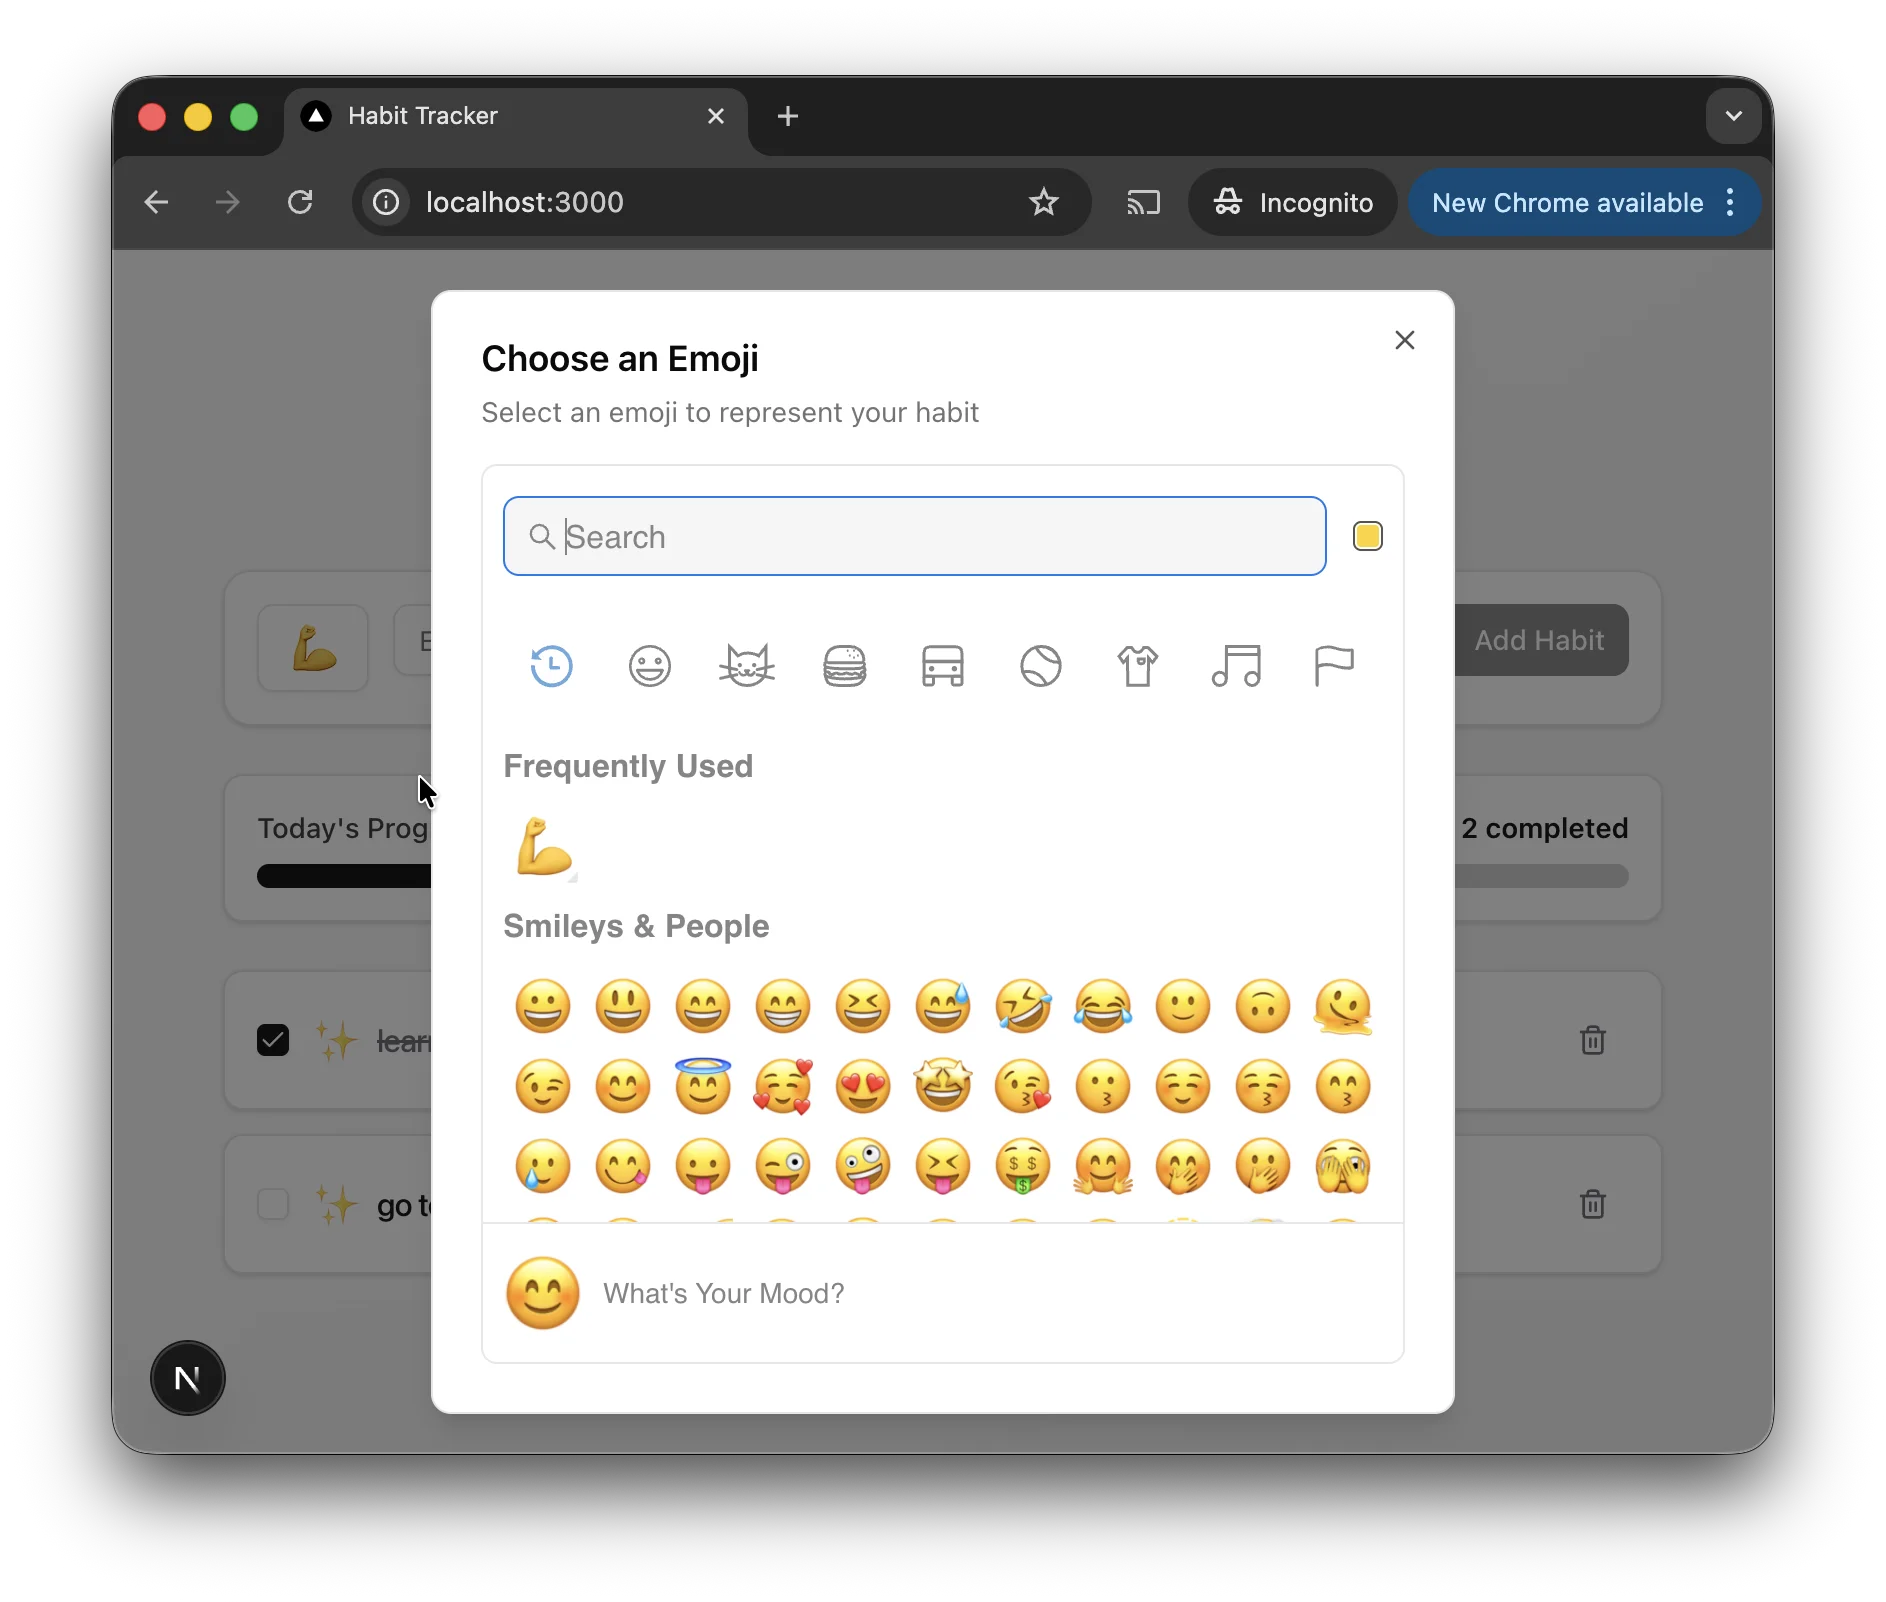
I'm creating a web application. It's called Habit Tracker. Here's the functionality it needs to have:- Add new habits (name + optional icon/emoji).- View today's habit list.- Mark habits as completed for the current day (toggle done/undone).- Persist habits and completion data in localStorage (no backend/auth).- Show progress (e.g., “X of Y habits done”).- Delete habits.- Responsive, accessible UI using Next.js (App Router), TypeScript, Tailwind, and shadcn/ui.
If anything is unclear, ask me specific clarifying questions before proceeding.Follow the project rules in .cursorrules at all times.
Pay close attention to the last two lines:
If anything is unclear...→ This ensures the Agent pauses to ask if you missed something.Follow the project rules...→ This is a safeguard. It's optional because the Agent is supposed to follow the rules we created, but it won’t hurt to remind it.
And this time, we need to switch the little dropdown mode to Plan.
It will now ask a list of clarifying questions. When the Agent has all the details, it will build the Plan for you.
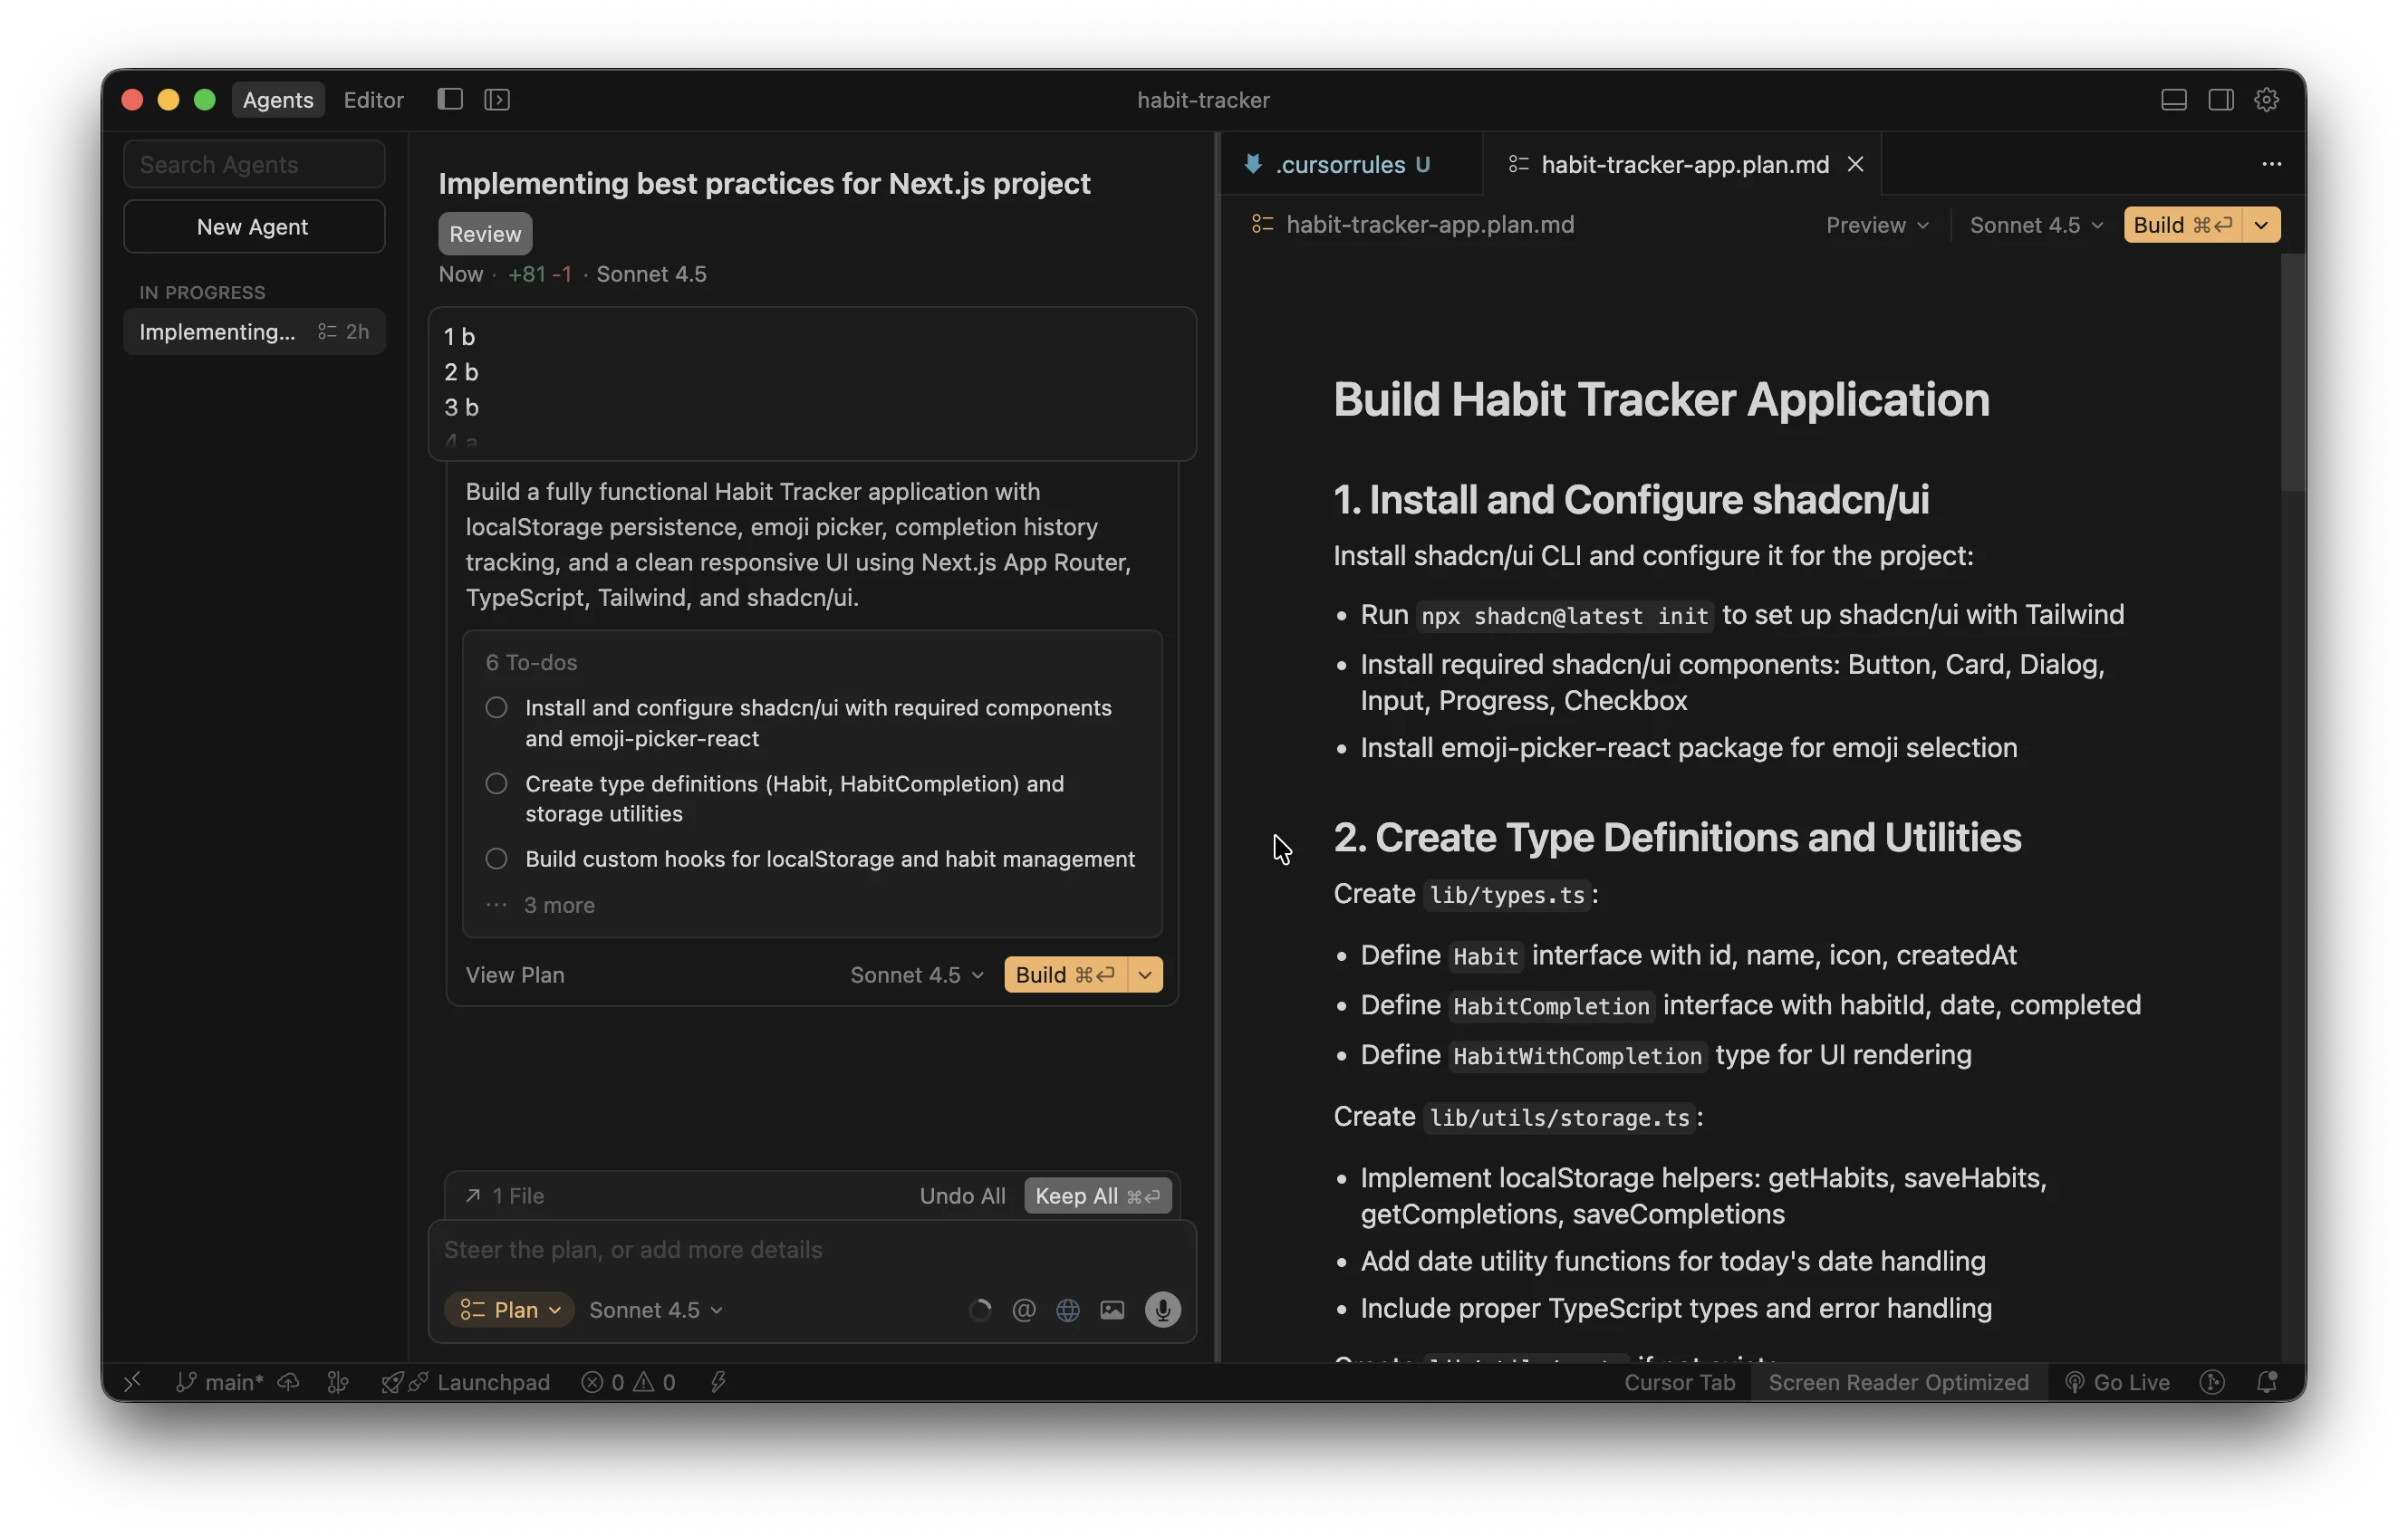
Review it carefully.
- If something is unclear →
Explain {this} and {that} - If something is missing →
Add this functionality
You get the idea, right? Just adapt the plan to your needs. Once you’re done, just click Build and let the AI magic begin 🙂.
During the building process, the Agent might ask permission to execute some terminal commands. It is generally safe to Allow these, but do so at your own risk.
Finally, just tell it to run the project.
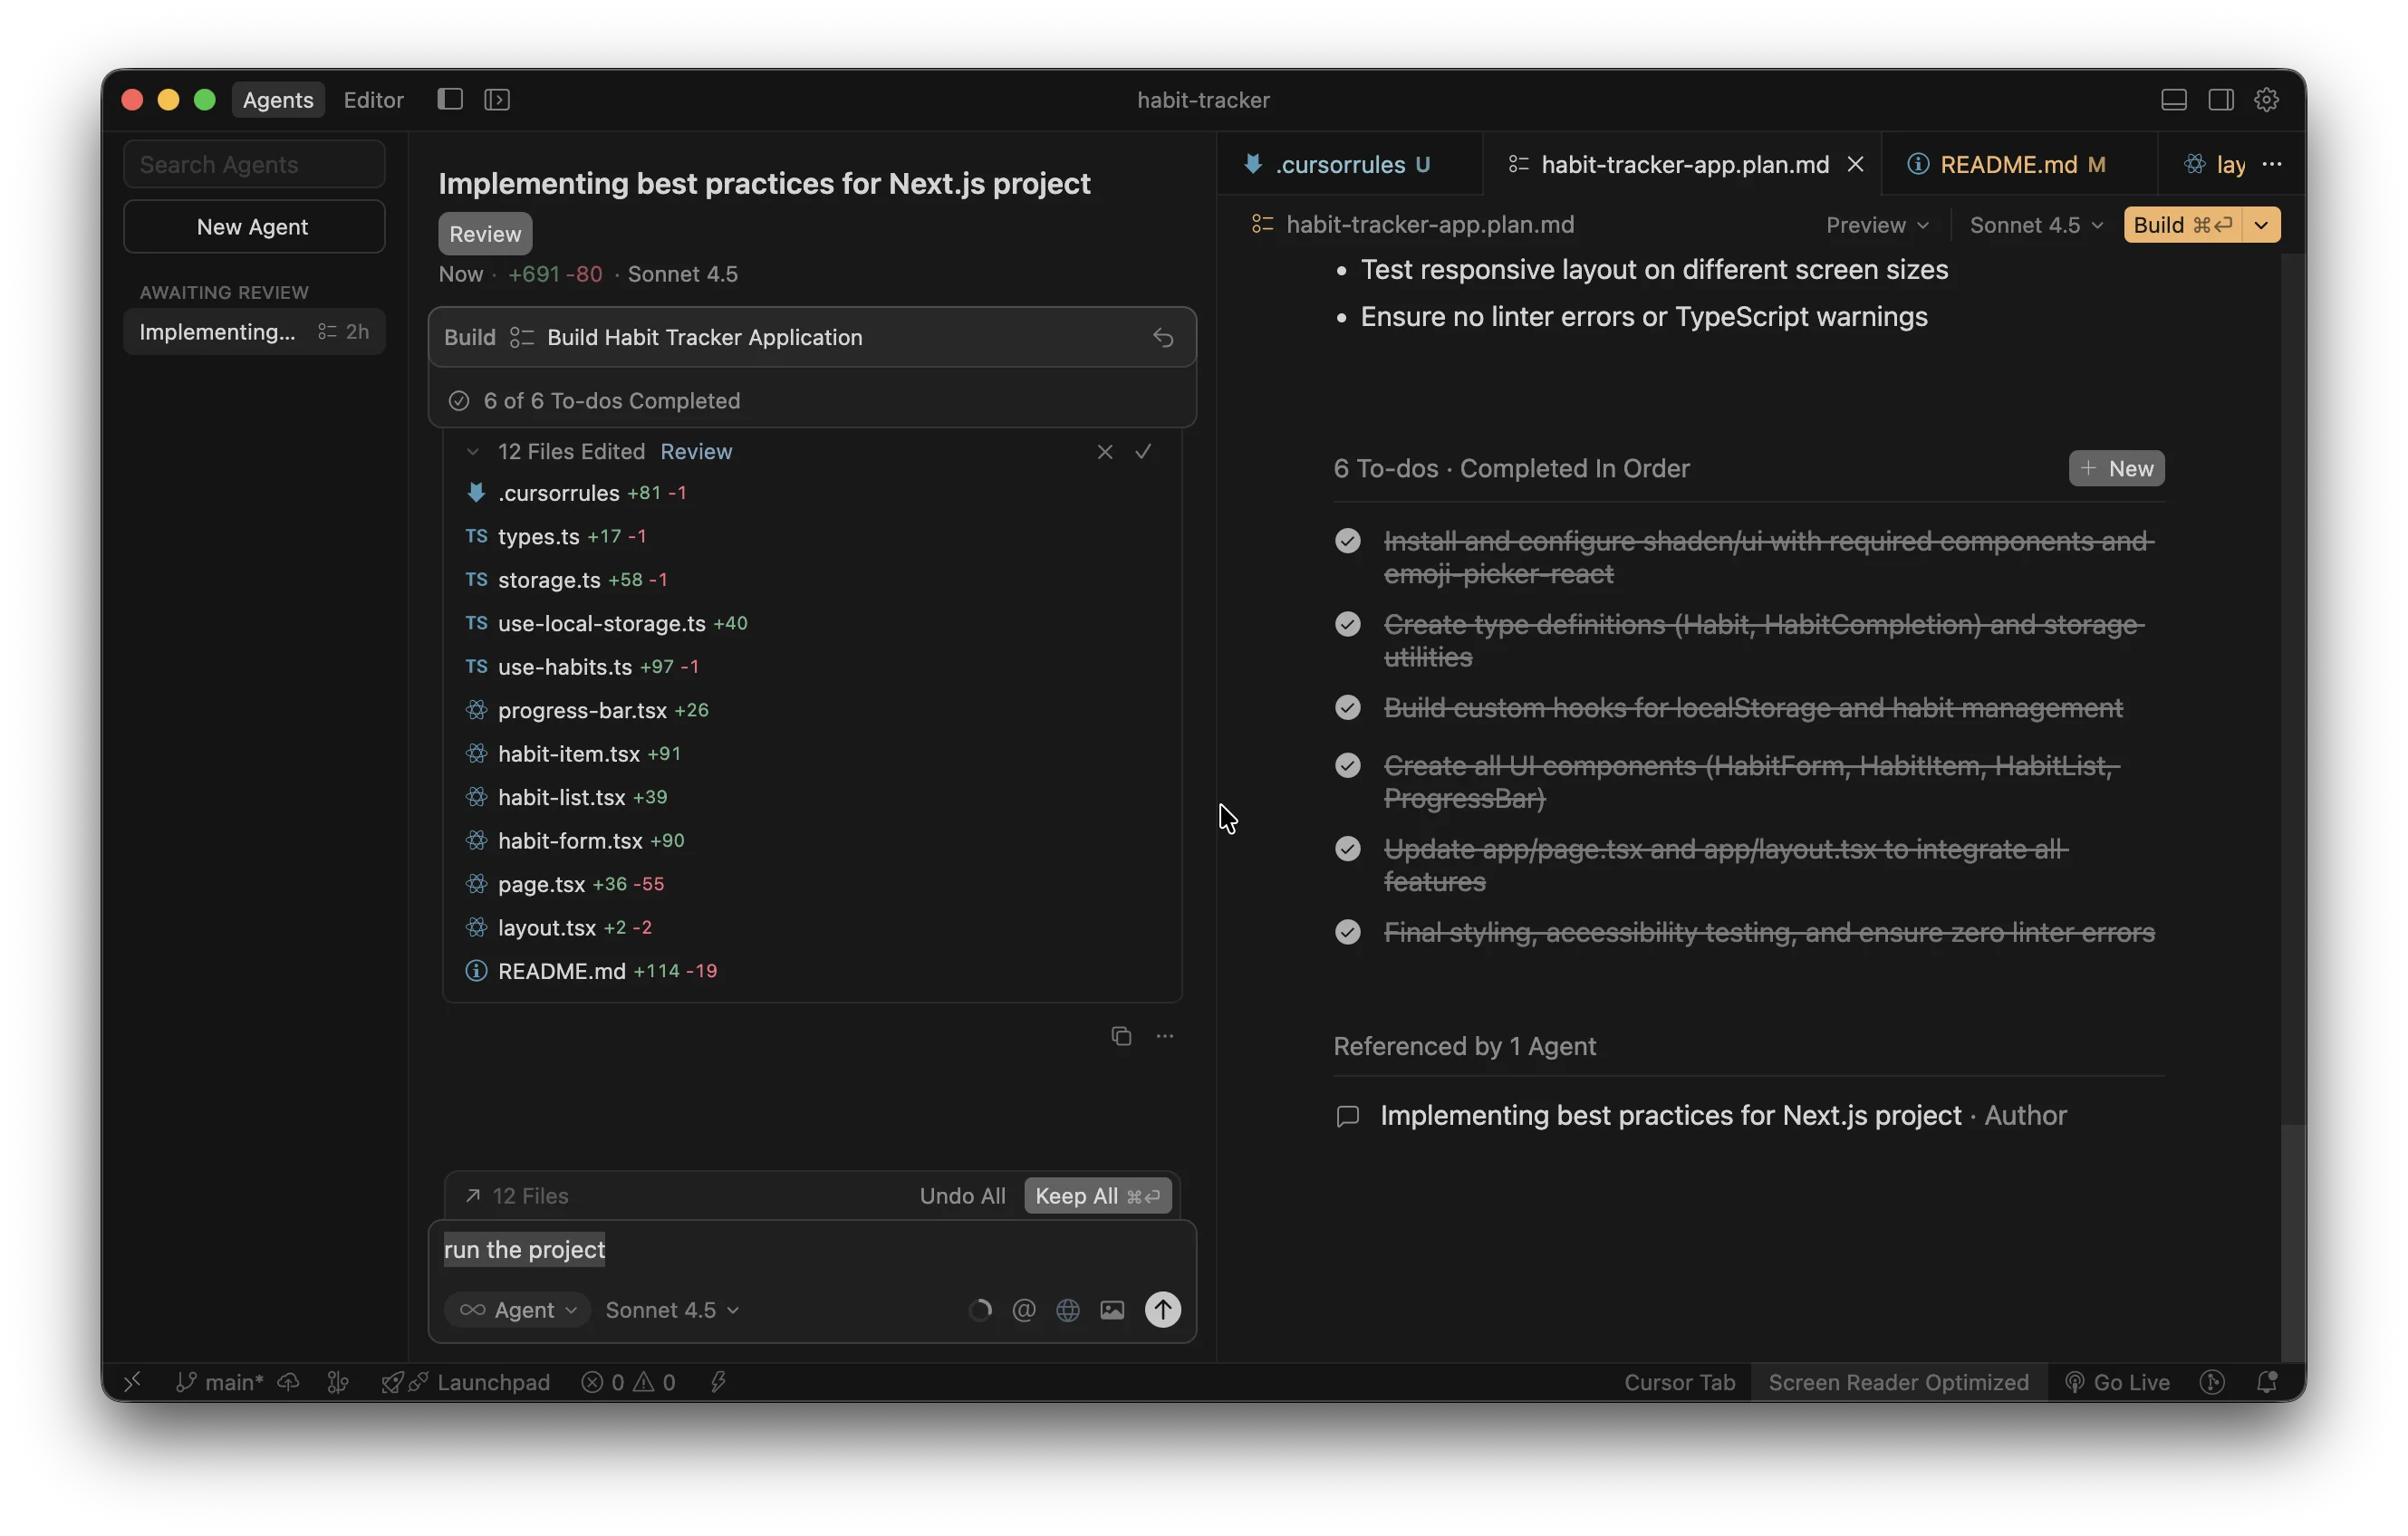
And you’ll get something like:
The Habit Tracker application should be accessible at:Local: http://localhost:3000So, I’ll open this in my browser. I got exactly what I wanted! But in case you didn't, keep talking to the Agent, asking for changes and fixes.
And by the way, you don’t have to write in English—write in your mother tongue if that’s easier for you!
4. Deploy to public
The recommended approach is to push your code to Git, create a new project at vercel.com, and connect it to your git repository.
This will deploy your code, and when you push new changes, it will redeploy automatically.
But if those words sound like alien language to you, here’s Plan B: manual deployment on netlify.com.
- Sign up.
- Select
Add new project→Deploy Manually. - Or simply go to https://app.netlify.com/drop.
Voila! Your code is deployed and can be shared with your stakeholders.
